Sunday, November 29, 2009

Polymer Bracelet

I made a large leaf cane and didn't want to waste the leftovers because I loved the way the colors had turned out. I was tired of round beads and gave this a try. It's comfortable and I love it. I textured the raw clay with the side of my bead hole tool (the grasping part), but you could texture it with anything and it would look great.
Two holes, elastic beading material, two size 6 beads (or E beads) between each large bead, tie it off, dot with a spot of E6000 glue, hide the knot and it was done.

Thursday, November 26, 2009

1969 My First Polymer Sculpture

I sculpted this in late 1969 from Sculpey.
I don't remember what I used for tools; wasn't much out then. I probably used a toothpick and my fingernails.

But, before I go, here is my tissue blade holder covered in my canes. This too, is old; probably about fifteen years old.

So, on this Thanksgiving Day, I want to say how thankful I am for all my loved ones (family and friends) and the time I have spent with them. Without their love and support, I would not be here. I am most thankful for my husband who has loved me through the worst of times. I give thanks daily for all my blessings, but I am especially reminded today of how lucky I am. I am grateful to have you and this blog which has given me focus and kept me moving forward. Here's wishing you a Happy Thanksgiving!

Wednesday, November 25, 2009

Polymer Clay Bangle

Covered a brass oval bracelet blank with one of my snakeskin cane patterns. This bracelet was a first too! Having so much fun making bracelets. Nice when things turn out the first time around.
Below is "The Announcer". He keeps telling me to get my butt in gear and get this house in order for our out of town company.

Tuesday, November 24, 2009

My First Cuff Bracelet

I made this polymer clay cuff last night. I bent an aluminum band into a cuff and then covered it with a pre-blended jade color strip of clay. Then I applied slices of canes to the raw clay. I had some leftover leaf canes and geometrics (which made some nice abstract flowers).
I wanted a 3-D effect with the flowers, so I double-layered every other petal. It's my first cuff and I'm happy with it.

Monday, November 23, 2009

Making Molds

This morning I made a quick mold (middle) of a piece of coral (left) and the jade-looking piece on the right is the result. It will be a pendant when I am finished.

Friday, November 20, 2009

Knot for Everyone

This is knotted polymer clay. I made it in 1998. It was so interesting how these long ropes of clay could be manipulated into actual knots and baked that way. I still wear it and enjoy it just as much as the first time I wore it over ten years ago.

Thursday, November 19, 2009

Polymer Clay and....

The above pin combines PaperClay and Polymer Clay.
These are little sculptures I was experimenting with to see the differences between using PaperClay and a paper mache' fiber mix. The PaperClay was much easier and cleaner to work with than the Paper Mache' fiber mix. Although the PaperClay dried much quicker than the paper mache', it could be easily formed and sculpted. Achieving small detail with the PaperClay was not a problem. The paper mache' fiber mix was messy and hard to work with. They both dried hard as a rock without any structural cracks. A fun experiment; a not so fun clean up.

Wednesday, November 18, 2009

Beadwork

Finished the peyote lariat and not that nuts about it. I hate when that happens. But what have I learned from it? That all size 11 seed beads are not the same size. Yes, I knew that; but now I have internalized it. It's one thing to hear and surface understand something and another to REALLY get it--to have that "ah-ha" moment! Now I got it.
When I do another (if I do another), I will use all delicas.
The below crocheted rope has the closure in the front. I use sterling silver components and wire. The closure was a nice heavy sterling and turquoise toggle from Rio Grande Jewelry Supply.
The below two photos are from the "To Be Finished" trays. They are crocheted ropes that I need to fringe. However, one of my friends said she wanted a red one without anything on it; just plain with no fringe. Boy, that made my life a little easier. So I will finish off the threads and see how the "plain" ones sell at the next fair.
I can always fringe them later, so nothing to lose.
Rita Sova's website http://www.sova-enterprises.com/ is one of my favorite sites to purchase patterns and e-books from. She also has http://www.bead-patterns.com/ and writes Bead Patterns magazine. I purchased my bead storage containers and shelves, "Pavillion" through Rita, as well as several e-books and many bead patterns. She also has lots of free information, a newsletter, gallery, swaps, yahoo chat group, 13,000 patterns from hundreds of artists worldwide.

Tuesday, November 17, 2009

Beaded Bracelets

I strung this bracelet on Beadalon and strung a tiny copper charlotte between each disk to eliminate abrasion and to ease the tension in the curves.
The closure consists of looped charlottes on a magnetic closure. I made a Dutch Spiral bracelet (below) and slipped it over memory wire. Glued some vintage roundels and a black crystal on the ends and then glued the end cap on the memory wire.
I bought a broken necklace at an estate sale (took it apart to use the beads) and was told these were "very old" black beads. I used a simple peyote stitch and finished it with a magnetic closure, which if I had it to do over again, I would have finished it in a beautiful sterling clasp.
Below are two embellished free form peyote bracelets I made.
These were four embellished free form peyote bracelets I made and sold in Chicago before our move to Arizona.
Free Form Peyote is my favorite. I guess because I can't make a mistake; it is such a forgiving stitch. There is no set pattern or rules. The stitch just takes you where it wants to go and you follow.

Sunday, November 15, 2009

Just Stringing Along....

I wanted a "candy" necklace for the holidays and went through my collection of beads and found enough to make a cute and colorful piece. Love those lampworked cupcakes and candies!
Above is a bracelet I made to use up a lot of my "orphan" beads. Love it. In the below necklace, the focal bead was a special gift from someone I love very much and I wanted to incorporate it into an unusual design. I am very happy with the end result and treasure it.
Below is a vintage necklace I did not want to take apart, but it just wasn't "me". I found some resin turtles that I could easily drill and attach jump rings to and it is just what I had in mind.
I always have fun wearing it. Guess you couldn't help but feel good when you are wearing turtle jewelry.

Saturday, November 14, 2009

Embellished Beaded Bracelets

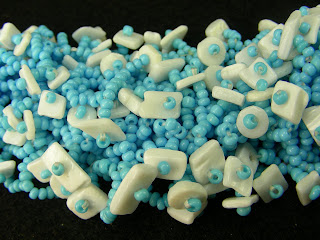
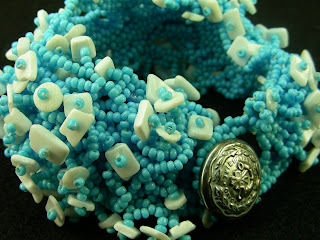
I had a great time creating these bracelets. The base stitch is peyote and then I just started looping through each base bead and stringing a piece of shell in the middle of the loop.
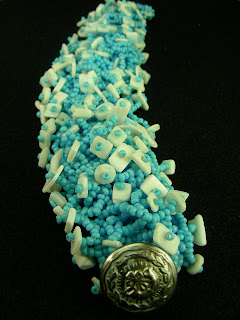
I used a metal button for the closure. I use Silimide beading thread instead of the small spool of Nymo. I have used it for over ten years and have never had a problem (knock wood). Nymo splits and frays too much for me.
This bracelet ended up with a really nice curve to it and is extremely comfortable. I liked it so much, I made another in black and white. I added fringe to the loop closure and used a black and white plastic button instead of metal.
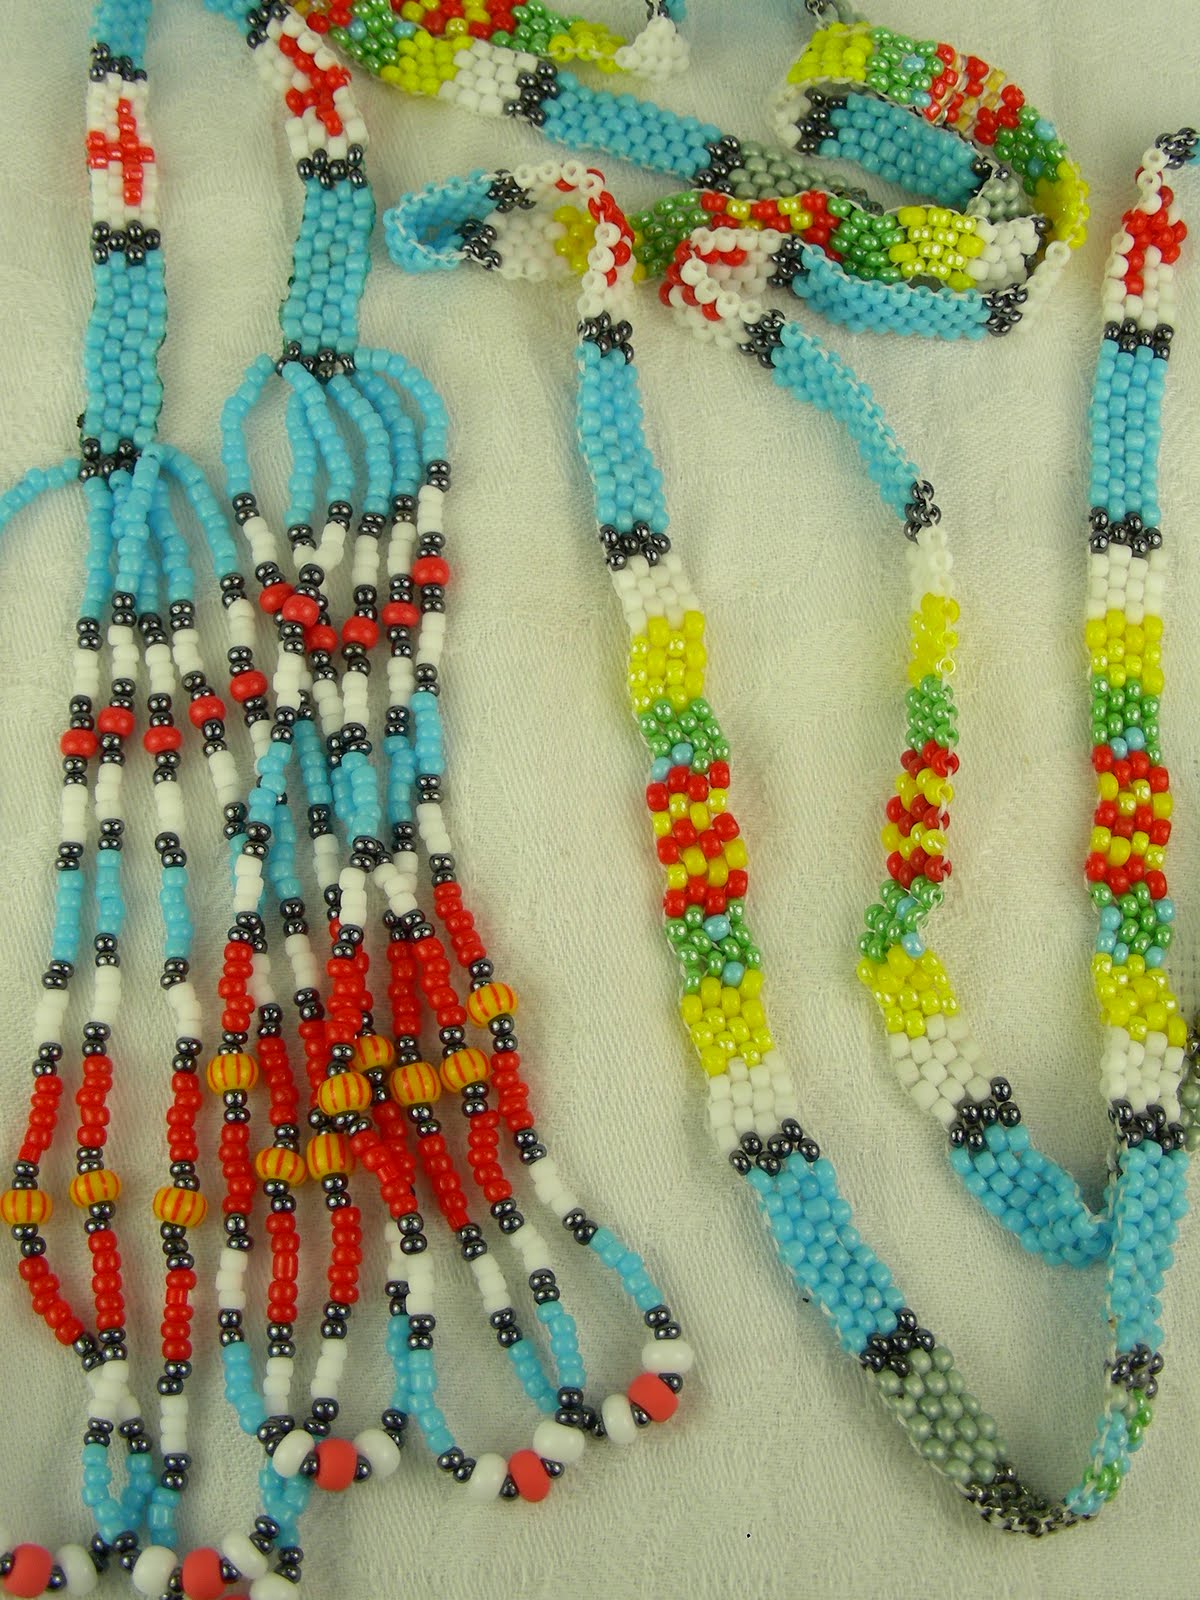
Below are a few others I have had fun making.

Friday, November 13, 2009

Copper Leaves, River Rocks

I'm working on adding the copper metal leaves to the polymer clay river rock necklace.
Use a thin gauge copper, cut out the leaf shape, lay it on a sponge or something that will "give" when you push on it and use a stylus to impress the lines of the leaf. Impress a nice deep one down the middle so that you can fold and shape the leaf when you are finished.
I'm re-arranging my studio so am putting up some inspiration pieces. I had such a good time making the above necklace based on Jean Campbell's beaded peyote buttons. Kind of my own interpretation.

Wednesday, November 11, 2009

Sculpture for Bronzing

Yes, I re-arranged my studio and cleaned and sorted and kept and tossed and uh-oh.....got distracted as soon as I picked her up to re-locate her to another shelf. Thought I would just sit down and work on her a little bit more.  I purchase the oil based non-hardening clay in blocks and don't really care if the colors because when you have the piece bronzed, the color of the clay does not matter.  She's an ongoing project.

Tuesday, November 10, 2009

Collage Images


I had several reprints of tags leftover from the art fair. Hate to waste, so tore them up and
threw them on the copier. The fun of this is not knowing what will show through and what won't and how that will play out and what you can combine it with later.
Looked good to me so this one went in the collage file for future use.

Monday, November 9, 2009

Fall Art Fair 2009

Thought I would post photos of some of the pieces I sold.

Polymer clay, beading, textile, textile hardener, acrylic paint & sealant.

Acrylic paintings.


Air dry polymer clay "Flower Boxes".