I was in the process of making a large oyster shell pin and I got this far. I still had the props set up in the light tent so I started fooling around with the lighting, etc. and never did finish the pin.
I don't have Attention Deficit Disorder...........oh look, polymer.
Thursday, February 28, 2013
Wednesday, February 27, 2013
Polymer Ring
I'm still making simple black and white canes and kaleidoscope canes.
I wear large rings; love them. So, it was inevitable that I would eventually make one with the kaleidoscope cane. Sweet little morsel.
Tuesday, February 26, 2013
Raising Cane
I'm still working on creating simple canes and kaleidoscope canes and, oh yes, you HAVE to throw in a Stroppel cane. Want to learn how to make a Stroppel cane? The creator, Alice Stroppel shows you how in this free video tutorial (click HERE).
Monday, February 25, 2013
Free Beaded Shamrock Tutorial
First you learn how to make a tiny beaded heart, then you put three of them together and you have a shamrock pendant. Click HERE to go to the HandmadeJewelryClub.com to see the free video on how to make the beaded heart. Eri Attebery is the teacher.
Sunday, February 24, 2013
Mirror, Mirror
What a treat it was to see this mirror in person! Wow! All Swarovski crystals in many different sizes. It hangs in Cathy Breyne's shop, Unique Vintage Chic, 6166 E. Scottsdale Road, #201 in Scottsdale, Arizona.
I photographed it last year when it was selling for $8,000 in Cathy's shop. The original owner of the mirror paid over 3 times that. The mirror recently sold to a woman who purchased the mirror along with two crystals chandeliers. If you click on the photos, you will get a better view of the crystals. Just amazing.
I photographed it last year when it was selling for $8,000 in Cathy's shop. The original owner of the mirror paid over 3 times that. The mirror recently sold to a woman who purchased the mirror along with two crystals chandeliers. If you click on the photos, you will get a better view of the crystals. Just amazing.
Labels:
Miscellaneous
Saturday, February 23, 2013
Polymer Flower Pins
Labels:
Flowers,
Jewelry,
Photography,
Pins,
Polymer
Friday, February 22, 2013
Kaleidoscope Pendant
Labels:
Canes,
Kaleidoscope,
Necklaces,
Pendants,
Polymer
Thursday, February 21, 2013
Wavy Pendant
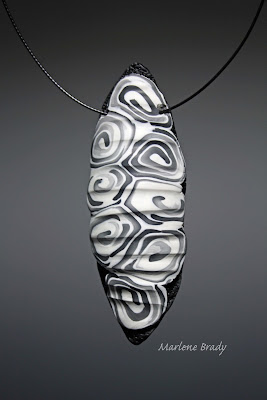
A cable is threaded from front to the back on the right side, around the back and from the back to the front on the left side. I will be making more of these because I love the way it hangs. I used scrap clay from the black and white canes to make jelly rolls. I took 8 slices from one of the jelly rolls and placed them on a black sheet. I rolled it through the pasta machine on #2, turned it sideways and rolled it through #3. I cut out the shape and then used a knitting needle to make angled indentions. I then curved it and baked it. Then I drilled the two holes.
Wednesday, February 20, 2013
Tuesday, February 19, 2013
Bangles & Earrings
I'm on a black and white kick. I made some simple black and white canes. Combined, reduced, cut, regrouped; just played. Then I made a couple of simple bangles and a pair of earrings. Then I played some more.
Monday, February 18, 2013
With or Without Tassle
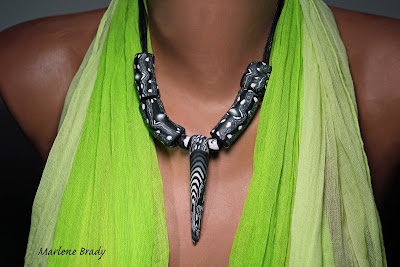
I finished using the rest of the black and white inclusion cane by making some extra large tube beads. They were kind of lost by themselves, so I strung them all and threw on a tassel. Made me smile.
I will post some of the pieces from the black and white inclusion cane later. To learn more about inclusion canes see this post (click HERE). Tomorrow is black and white simple canes.
Sunday, February 17, 2013
Right Angle Weave and Rhinestones
I am still practicing jewelry photography and having so much fun. Above is an old rhinestone flower pin that is 4-1/2" X 2-1/4" which photographs beautifully against the blues and purples of some of my right angle weave beadwork. Inspirational Beading has a free tutorial on flat openwork square right angle weave (click HERE) and Beadaholic has a great video tutorial for flat right angle weave using crystals (click HERE). I also have free tutorials on my Pinterest board (click HERE) for right angle weave.
Labels:
Jewelry,
Photography,
tutorials,
Vintage
Saturday, February 16, 2013
Inclusion Cane Beads
I made some polymer clay inclusion cane beads. There are some great photo tutorials on the web. The first one I really like is from the blog Les Ethiopiques by Helene Jean Claude (click HERE) and the second one is from this creative blog (click HERE). I apologize for not supplying the artist's name and blog. Translation was not provided, but the great photos are self explanatory.
Thursday, February 14, 2013
Love
Happy Valentine's Day my friends. Above is the cake topper from my wedding February 15, 1969. Yes, I had red velvet, Valentines and pink champagne flowing from fountains. I wore antique ivory lace and a veil longer than my train. It was a big, beautiful reception that I will never forget. Life is good, I am blessed and give thanks for my groom everyday. Hope you have a memorable Valentine's Day.
Labels:
Holidays,
Photography,
Vintage
Tuesday, February 12, 2013
Valerie Hector
This is the card I received with my brooch. It says" Short Narrow Bar--gold weave-gold, copper & bronze beads from contemporary Japan are the most expensive beads made in the world today--the tiny black beads are early 20th century Venetian. Thank you! Valerie 9-92"
The inside of the card gives a short biography (click on photo to read). I loved having this handwritten explanation of what beads were used and where they were from. Such a wonderful personal touch.
I love her book, "The Art of Beadwork". If you are interested, it can be purchased through Fire Mountain Gems (click HERE).
"Short Narrow Bar"
Monday, February 11, 2013
Valerie Hector Brooch 1992
I wanted to get photos of the back and both ends of the Valerie Hector brooch.
When I did, I noticed I had given the wrong year the first time I posted it. The brooch is dated 1992.Both ends are resin sealed. The back of the pin is covered with ultra suede and the pin back is sterling silver.
Labels:
Photography,
Pins,
Vintage
Sunday, February 10, 2013
Friday, February 8, 2013
Jewelry Photography
I love this old pin I purchased at an estate sale many years ago. I will be practicing jewelry photography for the next few days so I have dug out some of the oldies (but goodies).
Labels:
Jewelry,
Photography,
Pins,
Vintage
Wednesday, February 6, 2013
Wrist Warmers & Smittens
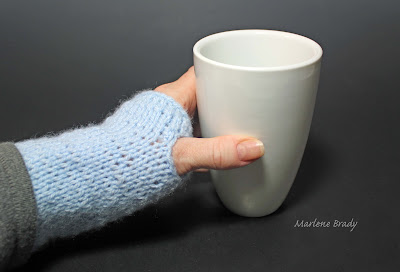
I got this pattern from the BBB Sisters on Design Sponge (click HERE). The instructions' link is in the 5th paragraph down. The post is called "Hunt, Gather and Host a Knitting Party". Everything from the invitations to what to serve is included.
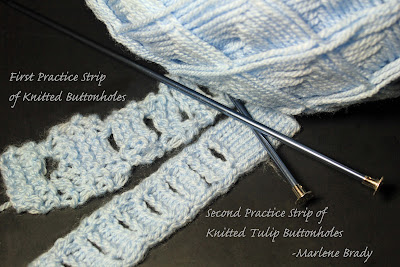
I wanted a finished buttonhole for the thumb opening, so I practiced the Tulip buttonhole until "I got it". It took me a while, but it was worth it. You can find the written instructions and a great video on Tech Knitting blogspot (click HERE). The lacy ones in the top photo lasted about a day and off came the lace. Simple and practical; love them.
How cute are these? Free knitting pattern from Coco Knits (click HERE). A great Valentine's gift.
Monday, February 4, 2013
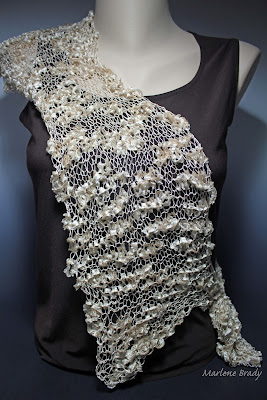
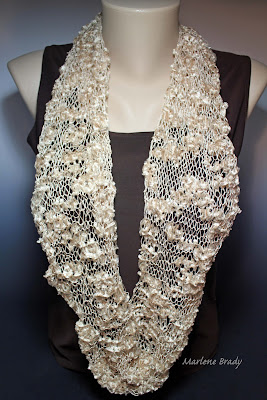
Knitted Scarf
This is the knitted scarf before I fringed it. I liked the way it looked and decided I would order more yarn and make a larger one. So, I shortened this one up by tearing out several rows and then fringing it.
I particularly like the texture and pattern of this yarn. It was fun.
I particularly like the texture and pattern of this yarn. It was fun.
Labels:
knitting
Saturday, February 2, 2013
Knitted Scarf
Size 10 knitting needles, 1 ball Feza Tokyo yarn, cast on 20 stitches and knit each row. That's it. How nice is that? I wanted an uneven edge so I increased every once in a while as you can see, but I never went over 30 stitches.
Then I would decrease back to 25, then up to 30 and then down to 20. Or you can leave a nice even edge of 20 stitches for the entire scarf, it is just as pretty. I originally did not fringe the scarf, but then changed my mind and love it. Just play.
Then I would decrease back to 25, then up to 30 and then down to 20. Or you can leave a nice even edge of 20 stitches for the entire scarf, it is just as pretty. I originally did not fringe the scarf, but then changed my mind and love it. Just play.
Subscribe to:
Posts (Atom)
